Tuesday, December 6, 2016

New hand held pencil sharpeners!!


Fourth grade has started their illustrated name project and will be using expensive watercolor pencils. In the past electronic sharpers often break and degrade our pencil supply.  Thanks to some Artsonia money we now have a class supply of hand held sharpeners! Thank you parents who have bought items on this site which helps fund our art studio.  


Saturday, December 3, 2016

Way to go Justin!

Congrats to one of my adorable first graders for having their artwork selected among hundreds of artworks to be exhibited at The New Jersey Performing Arts Center.


Saturday, November 12, 2016

Fourth Grade's Crazy Cubist Self Portraits


fourth grade cubist self portrait

Fourth grade spent the first unit of the year learning about CUBISM.  We examined many of Pablo Picasso’s cubist artworks and identified six techniques often found in cubist paintings such as the use of geometric shapes, frontal and profile in the same portrait, rearranged facial features, asymmetry, broken mirror effect, and abstraction. Students used their chromebook camera apps to take multiple pictures of their facial features and used them to create several observational drawings on note cards.  

Pablo Picasso


Portrait by Pablo Picasso


students using camera app on chrome book to take close up photos of their facial features.


Next, heads, necks, and shoulders were added (some more realistic while others more abstract) with the facial features arranged and glued on top.  We used tempera cakes and chose colors that reflected a specific emotion in our painting.  Lastly, we used oil pastels once the paint dried to bring out certain colors and add details/patterns.  Once students finished their portraits, they wrote artist statements that reflected back on their artwork and art making process.

Student Artwork   


Tuesday, October 18, 2016

TP IS WIRED


To conclude our unit on LINE and COLOR students examine the sculptures by American artist Alexander Calder.  We discussed how he manipulates wire to create a  variety of lines such as SPIRAL, WAVY, CURLY, and LOOPED.  Students learned how Calder used inspiration from the Ringling Brothers Circus to make his wire sculptures.  Next, we brainstormed all the different ways we can manipulate wire and came up with bending, twisting, zig zagging, curling, connecting, and curving.  Based on these techniques, students created their own wire sculptures paying careful to the principle of design BALANCE and element of design FORM.  For the previous class we defined PAINTING FROM OBSERVATION as painting what you see in front of you.  All of our young artists carefully observed the lines and colors in their sculptures and transferred it to their large scale
paintings only using the primary colors plus black and white. We had fun at the end of class trying to match each sculpture to its correct observational painting.  


Haring in The House Again!


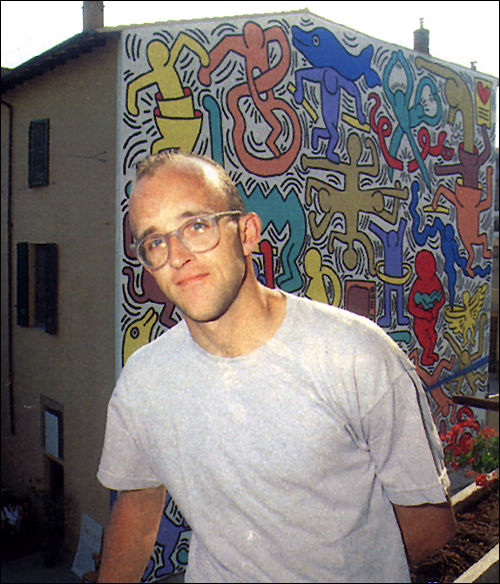
This is the second time I have used Keith Haring and the other project I did with kindergarten can be found HERE. For this project, transitional primary studied mural artist Keith Haring and made these large scale paintings in response to his work.  First, we learned how during Haring's childhood, he loved to watch his dad draw cartoons.  Once he got older, he moved to New York City to study art, and started showing up in subway stations drawing cartoon like characters on the empty
advertisement black boards.


Image result for keith haring
Keith Haring

Image result for keith haring

Keith Haring

We discussed why someone would want to make art outside or in public areas versus for a Museum.  Students concluded that it cost money to go to a Museum and art that was public could be  enjoyed by EVERYONE, rich or poor. Additionally, we dissected the message behind many of his murals to be world peace and for people to love everyone regardless of their differences.

To create our own Haring inspired art, we first played freeze dance and for each time we stopped the music, our students would come up with a pose and then have their body traced.  For the next class, we practiced using the primary colors to paint secondary colors inside of our bodies.  After our bodies were filled with primary and secondary hues, we added white to create tints.  The last day was spent creating a variety of lines in our bodies from spiral, curvy, wavy and loopy to zigzag and pointed.  This project wraps up our unit on line and color.


Wednesday, September 14, 2016

Roll a Picasso!


Every year I try to do something a little different on the first day of art class for each grade.  Typically we go over rules and routines, but I feel it is extremely important to still have time for a short art activity.  For fourth grade this year, we will be starting the year with cubism, so for the first day without having a complete introduction to the movement made famous by Pablo Picasso, students worked as a table to create one cubist portrait.  We started by reviewing how a portrait is an artwork of a person (usually head, neck, and top of shoulders).  

Next, students used the laws of CHANCE to create these fun portraits.  Students were so excited when creating these large scale portraits, because they did not have to worry about the pressure of making something look real as well as having to have a plan of what their artwork was going to look like from the start.  After all the portraits were created, we viewed them next to the original Picasso portraits and tried to match up which feature came from which painting.  See below and you can try and guess too! Next class, we will have a very in depth talk about cubism and the different techniques. 


Student Work 


 I found this great project at Teachers Pay Teachers and adapted it to work for our class,